Coachmen Leprechaun

The restoration


Blag
Eat's Sleep's craic
Avatar
Gender:
Location: Co. Cork
Age: 55
Posts: 2525
Registered: 08 / 2012
My Motorhome: 1980 Coachmen Leprechaun
Base Vehicle: GMC G35 Vandura. 6.7 Litre Chevy V8
Subject:

Re: Coachmen Leprechaun

 · 
Posted: 03.10.2016  ·  #321
Got another bit of painting and assembly work done over the weekend.

That should take care of most of the fiddly bits now:


Inner surfaces of the doors now finished with 3 coats of 'beige' top coat & dynamat stuck on.

Blower housing finished. Blower motor cleaned & tested. Ready to bolt on:


Blag
Eat's Sleep's craic
Avatar
Gender:
Location: Co. Cork
Age: 55
Posts: 2525
Registered: 08 / 2012
My Motorhome: 1980 Coachmen Leprechaun
Base Vehicle: GMC G35 Vandura. 6.7 Litre Chevy V8
Subject:

Re: Coachmen Leprechaun

 · 
Posted: 05.10.2016  ·  #322
Keeping the momentum going, I put on some more of the dynamat tonight. A bit akward on the driver side as the bulkhead wasn't flat. Lots of curves and bumps. I used a small roller and a tennis ball to push it into place. The job turned out ok. The templates worked out a treat and made it a lot easier to fit.

(The accelerator pedal is fitted also, although it's camouflage well!)

I fitted the passenger and driver side lower air vents also.

Driver side bulkhead:


I also fitted some fibreglass/foil heat barrier to the driverside lower footwell to try to minimise the effects of heat-rise from the exhaust manifolds. I'll probably put some additional aluminium heat shield in front of this as I recall the floors in the cab used to really get hot being so close to the manifolds & engine...


I tested the original split charge diode and it's still working fine, so with a bit of clean-up, it'll go back into service until funds allow an upgrade to a more intelligent split charging system. I found a good spot to mount it. The recess where the old steering column passed through the bulkhead is the perfect size to accommodate it. I need to check if there is enough clearance under the brake booster before I start drilling holes:


I had the wheels delivered to my office. When I brought them home today I discovered a problem. The diameter is a lot bigger than my own wheels, by over 3 inches... (7 inch circumference).
I need to talk with the supplier tomorrow to see what can be done.


Hopefully the bigger tyre can be used as I really like the extra height in the overall profile. I need to mount it to the front hubs over the weekend to make sure there's enough wheel arch clearance from lock to lock. I believe there will be based on some old photos, but I'd prefer to mount them to be sure:


I also need to figure out what the taller tyres will do in terms of performance .


CHAUSSON
Eat's Sleep's craic
Avatar
Gender:
Location: Tipperary
Posts: 6813
Registered: 02 / 2012
My Motorhome: Knaus Sport Ti 700 UFB Silverline
Base Vehicle: Renault Master 150 dci Quickshift
Subject:

Re: Coachmen Leprechaun

 · 
Posted: 05.10.2016  ·  #323
They might through out your speedometer a bit, then again most speedo's show a faster reading than actual speed and in that situation it might correct the Mph or Km/hr


Blag
Eat's Sleep's craic
Avatar
Gender:
Location: Co. Cork
Age: 55
Posts: 2525
Registered: 08 / 2012
My Motorhome: 1980 Coachmen Leprechaun
Base Vehicle: GMC G35 Vandura. 6.7 Litre Chevy V8
Subject:

Re: Coachmen Leprechaun

 · 
Posted: 05.10.2016  ·  #324
Quote by CHAUSSON

They might through out your speedometer a bit, then again most speedo's show a faster reading than actual speed and in that situation it might correct the Mph or Km/hr


:up:

The new wheels/tyres are for the front axle so I don't think it'll affect drivetrain or speedo (driven by the transmission).

But when I do change the four wheels & tyres on the back axle, then we'll see a difference.

I found a tyre calculator on the web and put in the circumference of old and new diameter tyres. The reading on the speedometer would reduce by around -3mph. I could live with that. The bigger tyres might sap a bit of torque, but I think I'll be ok there 8-).
I understand with a bigger tyre, the RPM will be a bit lower at say 50mph cruising speed, so it should be ok, but I doubt if it'll equate to better fuel economy. :lol:


JJF
Eat's Sleep's craic
Avatar
Gender: n/a
Location: Donegal
Age: 58
Homepage: MotorhomeCraic.com
Posts: 5351
Registered: 10 / 2014
My Motorhome:
Base Vehicle:
Subject:

Re: Coachmen Leprechaun

 · 
Posted: 05.10.2016  ·  #325
With that big long stroke V8 you will have torque in spade fulls.
Nice restoration you're doing there, keep up the good work.


presstout1
Eat's Sleep's craic
Avatar
Gender: n/a
Location: Carrickfergus
Age: 71
Posts: 821
Registered: 05 / 2016
My Motorhome: Rapido 896f
Base Vehicle: Fait Ducato 2.3
Subject:

Re: Coachmen Leprechaun

 · 
Posted: 07.10.2016  ·  #326
Wow! Blag, you have a heart like a lion to take on a project like that.
I'm relatively new to the forum & have dipped in & out of your posts since I joined.
Then I thought I should read it from the beginning.
only finished page 10, but really enjoying your adventures.
Thank you for sharing it. I look forward to catching up :up:


Blag
Eat's Sleep's craic
Avatar
Gender:
Location: Co. Cork
Age: 55
Posts: 2525
Registered: 08 / 2012
My Motorhome: 1980 Coachmen Leprechaun
Base Vehicle: GMC G35 Vandura. 6.7 Litre Chevy V8
Subject:

Re: Coachmen Leprechaun

 · 
Posted: 10.10.2016  ·  #327
Thanks for the kind comments. :up:

I didn't get as much done as I had hoped I would over the weekend. However, I did get a few bits finished. :-)

I stuck on more of the dynamat soundproofing:


Installed the battery bracket and dropped in the battery so I can route the brake pipes and wires around it:


Brake booster & master cylinder bolted on:


Blower housing bolted on:


Dog house heat insulation fitted. I pulled a load of this fibreglass backed aluminium foil out of a skip a few years ago. I didn't have a particular purpose for it until now! :lol:


Blag
Eat's Sleep's craic
Avatar
Gender:
Location: Co. Cork
Age: 55
Posts: 2525
Registered: 08 / 2012
My Motorhome: 1980 Coachmen Leprechaun
Base Vehicle: GMC G35 Vandura. 6.7 Litre Chevy V8
Subject:

Re: Coachmen Leprechaun

 · 
Posted: 10.10.2016  ·  #328
While I was at it, I fitted the steering wheel column:


It has a cool tilt mechanism that wasn't working properly before, but it's sorted now:
Up:

Down:


The rubber boot that seals the base of the steering column on the floor is a part that I have not been able to replace, so the old one will have to do. There are a few cracks on it, but I got some flexible epoxy glue that I'll use to repair the cracks. Then I'll coat it with a rubberised sealer and hope it doesn't crack in future.


Fitted the foot operated parking brake also, I just need to attach and route the brake cable:


I also got all of the ducting fitted to the air distribution box. The biggest pain of the weekend was finding all of the parts. I thought I was well organised, but it took ages to dig out everything needed.


Blag
Eat's Sleep's craic
Avatar
Gender:
Location: Co. Cork
Age: 55
Posts: 2525
Registered: 08 / 2012
My Motorhome: 1980 Coachmen Leprechaun
Base Vehicle: GMC G35 Vandura. 6.7 Litre Chevy V8
Subject:

Re: Coachmen Leprechaun

 · 
Posted: 11.10.2016  ·  #329
I wonder...... :lol:


CHAUSSON
Eat's Sleep's craic
Avatar
Gender:
Location: Tipperary
Posts: 6813
Registered: 02 / 2012
My Motorhome: Knaus Sport Ti 700 UFB Silverline
Base Vehicle: Renault Master 150 dci Quickshift
Subject:

Re: Coachmen Leprechaun

 · 
Posted: 11.10.2016  ·  #330
Quote by Blag

I wonder...... :lol:


:fgrin: :drools: Are you getting her ready for Santa pod, Kevin. :D


Blag
Eat's Sleep's craic
Avatar
Gender:
Location: Co. Cork
Age: 55
Posts: 2525
Registered: 08 / 2012
My Motorhome: 1980 Coachmen Leprechaun
Base Vehicle: GMC G35 Vandura. 6.7 Litre Chevy V8
Subject:

Re: Coachmen Leprechaun

 · 
Posted: 11.10.2016  ·  #331
Quote by CHAUSSON

:fgrin: :drools: Are you getting her ready for Santa pod, Kevin. :D


:lol: :lol:


Wouldn't it be cool!

Not for me though, I can think of other places to sink a few grand other than buying a supercharger! :lol:


Blag
Eat's Sleep's craic
Avatar
Gender:
Location: Co. Cork
Age: 55
Posts: 2525
Registered: 08 / 2012
My Motorhome: 1980 Coachmen Leprechaun
Base Vehicle: GMC G35 Vandura. 6.7 Litre Chevy V8
Subject:

Re: Coachmen Leprechaun

 · 
Posted: 17.10.2016  ·  #332
I thought I was finished with metal bashing & welding. But I found a couple of parts I had forgotten about. They were tucked away in the corner of the shed under some junk.

The passenger and driver side seat bases.

Fixing those took up most of this weekend. Unfortunately I didn't think to take a photo of the condition they were in before I fixed them, but the curvy parts at the bottom of both seat bases were severely corroded due sitting in wet carpet for a number of years. I had to cut 50mm from the bottom of both seat bases and then shape & weld in new metal. Luckily, the area where the bolts are were in OK condition in both bases, so I could leave the corner bolts in place and replace the metal around them.

New metal, skimmed with fillers, sanded smooth and now wearing a few coats of high build primer:


I also had a bit of time left over to fit the door trim pieces and door cards. The chrome strips that secure the top of the door cards to the doors were badly rusted, but with a S/S wire-brush, alu-foil, autosol polishing paste and some patience, they came up nice and shiny again.
I had to cut holes in the new doors and inner bracketry a while back to make room for the door speakers (to match the holes cut on the original door cards). I'm still debating if I should fit the original 80's square speaker covers, or use the modern covers that came with the new 5" 230w Pioneer speakers I recently bought for the doors. Mrs C prefers the new round/black Pioneer covers, I prefer the old square 80's GMC covers. Either way I can use the new speakers with both covers, I just need to make my mind up. Will post photos of the covers the next time.


I'd like to have a modern and good quality stereo in the dashboard but this will involve some alterations to the centre console. It has a cut out for the very old style car radio with a pair of twisty knobs. The camper originally had an 8-track with AM radio!

[Old reference Photo:]

I would prefer to keep the original look, but behind it, have something powerful with USB or Bluetooth interface. And not spend a fortune doing so. I found a few options on eBay, but they're spendy... I need to keep looking. OR fit a modern touchscreen stereo with all the bells and whistles but have a false door in front of it with an old style dummy radio face... Watch this space.

I got a nice fender protector with my last delivery of parts from Summit Racing. Not sure if it'll fit when I have the fan shroud installed, but IF I can make it work, it might keep the upper frame header from getting scratched up when I'm working on the engine ;-)


CHAUSSON
Eat's Sleep's craic
Avatar
Gender:
Location: Tipperary
Posts: 6813
Registered: 02 / 2012
My Motorhome: Knaus Sport Ti 700 UFB Silverline
Base Vehicle: Renault Master 150 dci Quickshift
Subject:

Re: Coachmen Leprechaun

 · 
Posted: 17.10.2016  ·  #333
Just looking at your seat base's,Kevin, would it have been any benefit to make them swivel when you were working on them?


Blag
Eat's Sleep's craic
Avatar
Gender:
Location: Co. Cork
Age: 55
Posts: 2525
Registered: 08 / 2012
My Motorhome: 1980 Coachmen Leprechaun
Base Vehicle: GMC G35 Vandura. 6.7 Litre Chevy V8
Subject:

Re: Coachmen Leprechaun

 · 
Posted: 17.10.2016  ·  #334
I've had my eye on universal swivels on ebay, but I haven't pulled the trigger yet. I was thinking of fabbing up something, but I think I'd prefer to buy certified & tested swivels just for peace of mind.


CHAUSSON
Eat's Sleep's craic
Avatar
Gender:
Location: Tipperary
Posts: 6813
Registered: 02 / 2012
My Motorhome: Knaus Sport Ti 700 UFB Silverline
Base Vehicle: Renault Master 150 dci Quickshift
Subject:

Re: Coachmen Leprechaun

 · 
Posted: 17.10.2016  ·  #335
If you were going for one of those you might be better leaving the seat bases the thickness of the swivel shorter, on our last Motorhome the seat was too high with the swival and the passengers legs would not touch the floor in sitting position, on some Motorhomes there is a pipe fitted to rest your legs.


Blag
Eat's Sleep's craic
Avatar
Gender:
Location: Co. Cork
Age: 55
Posts: 2525
Registered: 08 / 2012
My Motorhome: 1980 Coachmen Leprechaun
Base Vehicle: GMC G35 Vandura. 6.7 Litre Chevy V8
Subject:

Re: Coachmen Leprechaun

 · 
Posted: 18.10.2016  ·  #336
Quote by CHAUSSON

If you were going for one of those you might be better leaving the seat bases the thickness of the swivel shorter, on our last Motorhome the seat was too high with the swival and the passengers legs would not touch the floor in sitting position, on some Motorhomes there is a pipe fitted to rest your legs.


That's a good point. I'll have a look at it in detail before placing an order. If we had this conversation last Friday I'd have taken an inch off the height of both seat bases over the weekend!! Ah well...
I may be able to undersling the lower plate of the swivel and get the whole assembly lower on the base.

We're not going back now anyway, I painted the bases lastnight and they're too nice to go cutting them up now. :lol: :lol:


PaulH
Paid up member.
Avatar
Gender:
Location: Bangor NI.
Age: 62
Homepage: thespaceplace.info
Posts: 876
Registered: 03 / 2012
My Motorhome: Thor Axis on LPG.
Base Vehicle: Ford E350 v10.
Subject:

Re: Coachmen Leprechaun

 · 
Posted: 18.10.2016  ·  #337
Fantastic work, such an interesting build :)


Blag
Eat's Sleep's craic
Avatar
Gender:
Location: Co. Cork
Age: 55
Posts: 2525
Registered: 08 / 2012
My Motorhome: 1980 Coachmen Leprechaun
Base Vehicle: GMC G35 Vandura. 6.7 Litre Chevy V8
Subject:

Re: Coachmen Leprechaun

 · 
Posted: 25.10.2016  ·  #338
I made fairly good progress this past weekend.

I spent most of the time de-rusting lots of tiny parts, in preparation for plating. I was just going to give the small parts a shot of isopon182 and move on, but I decided to go a step further. I ordered a zinc plate & yellow passivate kit from Gateros Plating in the UK.
Now that I've started changing out all of the old bolts with new shiny Grade8 yellow passivate bolts, I like the factory fresh look. So I grabbed most of the other tiny parts that I had in boxes and started cleaning them up on the wire-wheel. Washers, brackets, springs, clips etc. Items like these shims from the upper front control arms on the front suspension. Sher why not. :-)
Hopefully the kit arrives before the weekend so I can start playing with some chemicals. :bandit:


Mrs C was right, the new Pioneer speaker covers look tidier than the old original covers so we'll go with the new. I'll keep the old ones just in case I change my mind later. :lol:


Old:

New:


I also gave the engine cover (doghouse) a shot of primer & paint and dropped it into place. I know it won't be seen when covered in carpet and the plastic centre console is fitted, but while I had the paint out, I prepped it and gave it a shot of paint for good measure.

I also got on with cleaning up the lower chassis and engine-bay. I wasn't very careful about covering it when I started painting the bulkhead & inner cab, so there is a lot of overspray to tidy up. I want to get that done before I start bolting on the running gear and fit the engine & transmission. I'm hoping to get those done in the next few weeks God willing.


Ally
Founder
Avatar
Gender:
Location: Muckamore, Antrim
Age: 56
Homepage: motorhomecraic.com
Posts: 32881
Registered: 08 / 2011
My Motorhome: Lunar Roadstar 780
Base Vehicle: Fiat 2.8 JTD
Subject:

Re: Coachmen Leprechaun

 · 
Posted: 25.10.2016  ·  #339
Vantastival 17? :)


Blag
Eat's Sleep's craic
Avatar
Gender:
Location: Co. Cork
Age: 55
Posts: 2525
Registered: 08 / 2012
My Motorhome: 1980 Coachmen Leprechaun
Base Vehicle: GMC G35 Vandura. 6.7 Litre Chevy V8
Subject:

Re: Coachmen Leprechaun

 · 
Posted: 25.10.2016  ·  #340
Quote by Douzeper

Vantastival 17? :)


Definitely maybe. :lol:


TAYLOR.
Eat's Sleep's craic
Avatar
Gender: n/a
Location: Galway
Homepage: kencarrolladaptati…
Posts: 3093
Registered: 12 / 2012
My Motorhome:
Base Vehicle:
Subject:

Re: Coachmen Leprechaun

 · 
Posted: 25.10.2016  ·  #341
Quote by Blag

Quote by Douzeper

Vantastival 17? :)


Definitely maybe. :lol:


Cowboys and Heroes so :up: :up:


Ally
Founder
Avatar
Gender:
Location: Muckamore, Antrim
Age: 56
Homepage: motorhomecraic.com
Posts: 32881
Registered: 08 / 2011
My Motorhome: Lunar Roadstar 780
Base Vehicle: Fiat 2.8 JTD
Subject:

Re: Coachmen Leprechaun

 · 
Posted: 25.10.2016  ·  #342
Quote by TAYLOR.


Cowboys and Heroes so :up: :up:


Pfft! :P


ntg
Eat's Sleep's craic
Avatar
Gender:
Location: Portglenone. Co Antrim
Age: 25
Posts: 3860
Registered: 04 / 2012
My Motorhome: Autotrail
Base Vehicle: Comanche
Subject:

Re: Coachmen Leprechaun

 · 
Posted: 28.10.2016  ·  #343
Quote by Blag

Quote by Douzeper

Vantastival 17? :)


Definitely maybe. :lol:


There will be some admirers that weekend,will the tours be ticket only or first come first served.
Blag this must be the restoration of the century as far as Motorhomes goes and i would hope to be one of those on that first tour.
Congratulations and what a project :up:


Blag
Eat's Sleep's craic
Avatar
Gender:
Location: Co. Cork
Age: 55
Posts: 2525
Registered: 08 / 2012
My Motorhome: 1980 Coachmen Leprechaun
Base Vehicle: GMC G35 Vandura. 6.7 Litre Chevy V8
Subject:

Re: Coachmen Leprechaun

 · 
Posted: 28.10.2016  ·  #344
Thanks Norman,

Ah, maybe I've taken it a bit far with a camper restoration, but sher as long as I'm enjoyin myself out in the workshop, i'm not harming anyone! :lol:

Speaking of workshop....

That zinc plating kit I was talking about last week, arrived on Thursday and I couldn't wait 'til the weekend to have a play... 📖


I did a few parts with the usual plan.... practise on parts that won't be seen, and if I dont fu*k them up, then I can work on the more obvious parts that will be front and centre...

The kit is a fairly straight forward set up. All chemicals and detailed instructions were supplied, along with some basic safety gear. The only extra bits I needed were a few extra containers, some metal rod, a car battery, a multimeter and gallon of distilled water.

The first attempt turned out pretty good (if I don't say so myself O-) )!
Zinc plated shims on the left, (wirebrushed) originals on the right.


And the colour I'm going for is a yellow passivated finish which is basically a 30 second dunk in a container of warmed yellow solution after the 30 minutes of zinc plating!
Couldn't be easier!


Sure looks better than the way they were :lol:


[Edit] And later...

I Spent a few hours plating n' passivating over the weekend...

It got old and a bit tedious in no time to be honest, but the results were worth it.

I made a make-shift drying rack centered over the central heating boiler in the shed. The yellow passivate material needs >48hrs @ +15c to cure, so gotta leave 'em alone for a few days... I only did this lot for now. Will do more later...


On to proper work now... 8-)


Blag
Eat's Sleep's craic
Avatar
Gender:
Location: Co. Cork
Age: 55
Posts: 2525
Registered: 08 / 2012
My Motorhome: 1980 Coachmen Leprechaun
Base Vehicle: GMC G35 Vandura. 6.7 Litre Chevy V8
Subject:

Re: Coachmen Leprechaun

 · 
Posted: 03.11.2016  ·  #345
Underseal day...


Super messy stuff. I spent more time masking off the parts I didn't want painted than I did applying the bleedin' underseal!! :lol:


Blacking out the area that'll be behind the grill:


Blag
Eat's Sleep's craic
Avatar
Gender:
Location: Co. Cork
Age: 55
Posts: 2525
Registered: 08 / 2012
My Motorhome: 1980 Coachmen Leprechaun
Base Vehicle: GMC G35 Vandura. 6.7 Litre Chevy V8
Subject:

Re: Coachmen Leprechaun

 · 
Posted: 06.11.2016  ·  #346
I got a few more bits bolted on to the front end this weekend..


I discovered the new heavy duty track rod ends are bare metal. After touching them with my bare hands they started rusting an hour later! So I'll need to take them off again to paint or plate them. 😠


Blag
Eat's Sleep's craic
Avatar
Gender:
Location: Co. Cork
Age: 55
Posts: 2525
Registered: 08 / 2012
My Motorhome: 1980 Coachmen Leprechaun
Base Vehicle: GMC G35 Vandura. 6.7 Litre Chevy V8
Subject:

Re: Coachmen Leprechaun

 · 
Posted: 08.11.2016  ·  #347
Being the tight F*ker that I am, I chose not to pay the €200+ for removing the 4 tyres and sandblasting the rusty wheels. So, I decided to enforce some teenage slave labour!. (Not really)... For some extra pocket money, my son went at them with needle descaler, then a wire-wheel and then some 80 grit sandpaper. He did a mighty fine job too. Next job is to mask them off and prime & paint them. I'll get my daughter to help with this next weekend.


All in preparation for the early Christmas present which I ordered for myself last week... :D They should be here in a couple of weeks.


I gave the front calipers a full overhaul also. A good quality refurb kit was so cheap it was a no brainer to replace the seals and lightly polish the pistons.


Next item to be cleaned up is the starter motor. It's working fine, but it needs a wee bit of TLC. :lol:


Blag
Eat's Sleep's craic
Avatar
Gender:
Location: Co. Cork
Age: 55
Posts: 2525
Registered: 08 / 2012
My Motorhome: 1980 Coachmen Leprechaun
Base Vehicle: GMC G35 Vandura. 6.7 Litre Chevy V8
Subject:

Re: Coachmen Leprechaun

 · 
Posted: 09.11.2016  ·  #348
Cleaned n painted.

I plated the track rods also. They're a bit bright but I'm sure a few weeks of Irish road grime will tone them down in no time!


TAYLOR.
Eat's Sleep's craic
Avatar
Gender: n/a
Location: Galway
Homepage: kencarrolladaptati…
Posts: 3093
Registered: 12 / 2012
My Motorhome:
Base Vehicle:
Subject:

Re: Coachmen Leprechaun

 · 
Posted: 10.11.2016  ·  #349
Well done Kevin looks like 2017 is the year for its first trip :up: :up:


Ally
Founder
Avatar
Gender:
Location: Muckamore, Antrim
Age: 56
Homepage: motorhomecraic.com
Posts: 32881
Registered: 08 / 2011
My Motorhome: Lunar Roadstar 780
Base Vehicle: Fiat 2.8 JTD
Subject:

Re: Coachmen Leprechaun

 · 
Posted: 10.11.2016  ·  #350
Was wondering, rather than a restoration, is it not more of a rebirth? or reincarnation? :D


Blag
Eat's Sleep's craic
Avatar
Gender:
Location: Co. Cork
Age: 55
Posts: 2525
Registered: 08 / 2012
My Motorhome: 1980 Coachmen Leprechaun
Base Vehicle: GMC G35 Vandura. 6.7 Litre Chevy V8
Subject:

Re: Coachmen Leprechaun

 · 
Posted: 11.11.2016  ·  #351
Thanks lads.

Well the cab will be pretty anyway. Don't forget.... phase 2 has yet to be started. We haven't touched the back half of the camper yet! It still looks like an old worn handbag, but I haven't decided what to do yet. I like the character of the dents and worn paint here and there, and of course the vintage interior.... but the contrast of the sparkling new looking cab might force me to keep going with the refresh all the way back!


StrandCampingDoonbeg
Eat's Sleep's craic
Avatar
Gender: n/a
Location: Kilrush Co Clare
Age: 59
Posts: 2024
Registered: 05 / 2014
My Motorhome: mobilvetta mh 85
Base Vehicle: Fiat
Subject:

Re: Coachmen Leprechaun

 · 
Posted: 11.11.2016  ·  #352
Judging by your passion, professionalism and desire I would say you'd kick your self if you didn't follow on the great work on the cab to the habitation shell. Plus I enjoy the reading and the pictures.


CHAUSSON
Eat's Sleep's craic
Avatar
Gender:
Location: Tipperary
Posts: 6813
Registered: 02 / 2012
My Motorhome: Knaus Sport Ti 700 UFB Silverline
Base Vehicle: Renault Master 150 dci Quickshift
Subject:

Re: Coachmen Leprechaun

 · 
Posted: 11.11.2016  ·  #353
Quote by Blag

Thanks lads.

Well the cab will be pretty anyway. Don't forget.... phase 2 has yet to be started. We haven't touched the back half of the camper yet! It still looks like an old worn handbag, but I haven't decided what to do yet. I like the character of the dents and worn paint here and there, and of course the vintage interior.... but the contrast of the sparkling new looking cab might force me to keep going with the refresh all the way back!


If it was mine I would put it on the road and use it for a while and see if any problems crop up, nothing worse than back tracking on work you might have already done that was covering an underlining problem. You are on the home run now, Kevin!


Blag
Eat's Sleep's craic
Avatar
Gender:
Location: Co. Cork
Age: 55
Posts: 2525
Registered: 08 / 2012
My Motorhome: 1980 Coachmen Leprechaun
Base Vehicle: GMC G35 Vandura. 6.7 Litre Chevy V8
Subject:

Re: Coachmen Leprechaun

 · 
Posted: 13.11.2016  ·  #354
More sanding... :-(

I need to shoot some 2k primer on the outside of the doors before I fit them. Before I do that I have two low areas on the passenger door that need a skim of fillers. This is a different game to the previous filling and painting that i've done. Of course, this is the side of that will be seen so I'm trying to be super careful in getting everything smooth and straight. Block sanding and all that. I put a coat of isopon primer on them a few months ago to protect them from flash rust, but I sanded them down today to find any dents and imperfections. The doors are pretty good, but the passenger door needs a little fillers...

Here I have an old rasp that I modified to allow me to use strips of sandpaper. Block sanding starting with 40 grit, then 80, then 240 and finally 400.


I'm also working on painting the wheels this weekend. My daughter helped me to mask off the tyres in this photo (with some spiritual guidance from my dog) :lol: . The wheels currently have two coats of isopon182 zinc primer. On top of that, I'll shoot an additional 2 coats of 2k primer and then a couple of coats of satin black paint...


She's a bit shy (not really):


I also had to make some slight adjustments to the passenger side wheel arch. I had it all primed with 2k and it was ready for paint, but there was slight misalignment between panels that I was originally prepared to live with, but I after a while I couldn't help noticing it every time I saw it, so I sanded the arch back to bare metal and added a thin layer of filler to bring it up level with the rear section of wheel arch. The difference was only +1mm or so, but it was bugging me... Going a little backwards I know, but... Hey ho... :lol:

Here was the first layer of fibreglass fillers (before sanding).

Afterwards, I added a couple of skims of standard acrylic fillers and block sanded it all smooth. it's nice and even now. ^_^


Blag
Eat's Sleep's craic
Avatar
Gender:
Location: Co. Cork
Age: 55
Posts: 2525
Registered: 08 / 2012
My Motorhome: 1980 Coachmen Leprechaun
Base Vehicle: GMC G35 Vandura. 6.7 Litre Chevy V8
Subject:

Re: Coachmen Leprechaun

 · 
Posted: 21.11.2016  ·  #355
The ebay wheel covers arrived last Friday (from Nebraska) : :-)

(Polished-stainless)


I didn't get much done over the weekend. It was bitter cold and hard to stay away from the warm fire that was lighting in the house. :lol:

I had a bit of a disaster on Saturday morning... My IR lamp is on a tripod, and it fell over. Both elements shattered, so no comfort in the shed over the weekend.

Its a Dimplex QXD3000 IR heater that I got years ago for a very good price. However, the replacement quartz elements are around €90 each, and I need two! Now I really appreciate the bargain price I paid years ago!

Still need to shop around for a better price. I'll need to pony up for at least one element anyway, as I need the heat for the paint to set up at this time of year... Maybe next weekend will be a bit warmer... :lol:


kevinmoore
Craic Addict
Avatar
Gender:
Location: Meath
Age: 67
Posts: 398
Registered: 04 / 2016
My Motorhome: Benimar 494 Tessoro
Base Vehicle: Ford Transit
Subject:

Re: Coachmen Leprechaun

 · 
Posted: 23.11.2016  ·  #356
Quite a saga, very impressive work and commitment! I'm looking forward to seeing pictures of the completed project! Keep up the good work!


cashmp
Craic'er
Avatar
Gender:
Location: Cork
Age: 56
Posts: 51
Registered: 05 / 2012
Subject:

Re: Coachmen Leprechaun

 · 
Posted: 30.11.2016  ·  #357
Kevin
keep up the good work and make sure all those photos are backed up, like everyone else i cant wait to see the end product

patsy


TAYLOR.
Eat's Sleep's craic
Avatar
Gender: n/a
Location: Galway
Homepage: kencarrolladaptati…
Posts: 3093
Registered: 12 / 2012
My Motorhome:
Base Vehicle:
Subject:

Re: Coachmen Leprechaun

 · 
Posted: 18.01.2017  ·  #358
Hi Kevin.

Any update :up: :up:


Blag
Eat's Sleep's craic
Avatar
Gender:
Location: Co. Cork
Age: 55
Posts: 2525
Registered: 08 / 2012
My Motorhome: 1980 Coachmen Leprechaun
Base Vehicle: GMC G35 Vandura. 6.7 Litre Chevy V8
Subject:

Re: Coachmen Leprechaun

 · 
Posted: 19.01.2017  ·  #359
Quote by TAYLOR.

Hi Kevin.

Any update :up: :up:


Hi Ken, Sloooow progress over the last few weeks. I had some car trouble that needed some time and one or two other projects at home that took my attention away from the camper! :( And of course there was the 2 weeks of Christmas in between that I did sweet FA. :lol:

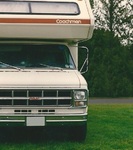
I did manage to paint and mount the 4 rear dually wheels, so that jobs a good un. I won't fit the new shiny wheel trims until later.


I had a bit of a snafu with the two new 16" wheels/tyres that I bought from the UK.

Short version:
They didn't fit so I had to send them back.

Long version:
Everything looked fine until I went to mount the wheels to the hubs. They just didn't fit right and were a bit sloppy so I got in contact with the supplier and we exchanged a few emails. From their point of view the wheels were a "universal fit" and they've sold loads of them to many chevy RV owners across Europe. But I did a lot of measuring and things just didn't add up for me. I approached two local mechanics and third large commercial wheel/tyre business for some advice.

With no disrespect intended to the supplier (who have been very helpful), I'll share this info for RV'ers that might find themselves in my position in the future...

Its all about the hub centre...

My factory wheels are what's called "hub centric" which means the wheels must mount onto a hubcentric ring (shoulder) that is on the face of the hub. That ring supports the weight of the vehicle (not the lugs). Best described in a photo perhaps -

The silver bit below, hub centric ring (or shoulder) is on the face of the hub and the wheel should fit snugly on this shoulder. But on the wheels I bought (and was told would fit), the hole is much bigger than the hub centric ring. 5.3mm to be precise. 📖 You can see a bit of a gap between the two.


Here I have the new wheel laid down on top of my old original wheel. With the lug holes lined up, you can see the hub centres are different. The originals are smaller.


Now the supplier insisted these wheels were universal and lug centric, but the 3 independent professionals I took the wheels to, looked at me like I had two heads when I told them that's what I was told... All three mechanics said lug centric dually wheels would have "coined" lug holes, (4 inward bevels & 4 outward bevels) where the lugs are tightened up. These bevels are the key to ensuring lugcentric wheels are centred correctly, especially on the rear dually wheels.They all said if I fitted these wheels to my vehicle, I could have problems with vibration (at least) or wheel lug failure!!! Bad news obviously...

Here's an example of a lugcentric wheel that I found on the internet. You can see the countersunk detail around the lug holes that centre the wheels by means of tightening down with tapered nuts.


So it confirmed my fears.

In parallel, I put the question out there on a couple of Chevy forums and got the following information regarding the hub-centric dimensions for the three main RV manufacturers:

Info:

GMC/Chevy - 4.56 inch (115.82mm)

Dodge - 4.77 inch (121.15mm)

Ford - 4.88 inch (123.95mm)

The wheels I bought, were Dodge wheels NOT universal and NOT suitable for Chevy. :(

So it's clear the hub centres on the above manufacturers are not exactly compatible. Now I played with the idea of machining up some spacers to make things work, but I also discovered the wheel offset was also different, by about 20mm. With the higher profile tyres on the 16" wheels, this meant the wheel arches would need some modifications to make them work for me.

Too much effort. So I sent the wheels/tyres back for refund or replacement with 16.5" tyres instead.

I was very disappointed with this as my choice in new radial tyres is now limited to the one manufacturer that I can find. Firestone TransForce 875x16.5" which are around €250 a pop + delivery. :sick: And I need 6... :sick: :sick:

I do have the option to go for Deestone 800x16.5" crossply tyres on my original wheels, which are 30% cheaper, but I need to decide which is best for me. I prefer radial for road holding manners, but I could save a wedge of €€ by going for cross ply... decisions decisions... Anyone with experience of crossply tyres, please chime in! :up:

I didn't get a whole lot more done on the bodywork other than fine detail on the passenger side wheel arch that I did more work on a few weeks ago.

I bought some replacement anti roll bar bushings but neglected to order the metal brackets that hold the bushings in place. SO I had to pick out the best of the old ones that I removed from the camper (and donor van) to clean them up and zinc plate them. So they are mounted to the front suspension now.


That's about it, Oh, I recycled an old bicycle shed from work and repurposed it at home for occasional use around the back of my workshop!


Blag
Eat's Sleep's craic
Avatar
Gender:
Location: Co. Cork
Age: 55
Posts: 2525
Registered: 08 / 2012
My Motorhome: 1980 Coachmen Leprechaun
Base Vehicle: GMC G35 Vandura. 6.7 Litre Chevy V8
Subject:

Re: Coachmen Leprechaun

 · 
Posted: 19.01.2017  ·  #360
It's a pity there is no Walmart in Ireland!

https://www.walmart.com/ip/Fir…0/17790919

If any of you know of someone shipping a container back from the US to Ireland, I wonder if they'd have room for 6 tyres...


Selected quotes for multi-quoting:   0